- -> Retro Gaming PC Build Log Part 1 : Host PC and Front End
- Retro Gaming PC Build Log Part 2 : Commodore 64
- Retro Gaming PC Build Log Part 3 : PC Games with GOG
Last Updated on August 14, 2022.
The Goal
It seems when I’m able to come anywhere near close to dusting off some retro gaming work, I boot up whatever RetroPie or Windows based system I’ve set up for some retro gaming years back and can’t for the life of me remember how I set things up from either a taxonomy standpoint, controller setup, emulator configurations, and more. I’m using these build logs to document my thought processes at the time and ‘Figure it out’.
The Hardware
Now, I’m not a retro gaming purist. I’m at best retro gaming purist adjacent. This means I love playing games on the older hardware, but with limited space, I can’t set up all the things. I can set up some retro systems here and there, but I can’t set up everything in one big retro corner. I’ve taken up enough corners in this house with my hobbies. In fact, I’m fresh out of corners. So, I’m going to emulate quite a bit, whether it’s Stella for the Atari 2600 or DOSBOX for Ultima Underworld. I very much enjoy playing games on the original hardware when I can – but when it comes to easily streaming live content or looking up videos and articles about the game, it is very much easier to do it on a PC running emulation software. Plus, I get to compare how the emulators compare to the real deal at my leisure.
Most of the time you don’t need a fancy machine to emulate old retro games – look at RetroPie for example. You can emulate a metric crap ton of games on a Raspberry Pi. The machine I chose is a bit beefier than I would need, but that’s because it’s available to me. Why not a Pi? I have a lot of DOS and Windows games as part of my ‘Bucket List‘ which rules out the Pi right quick – the Pi is great for certain computer and console emulation, but starts to have some issues in retro libraries of later eras (like Windows 9X games). Plus, some of those may require some video acceleration – and for that I’ve an NVIDIA card to take care of the heavy lifting. It’s not for the latest and greatest, but it will do for the oldest and greatest just fine.
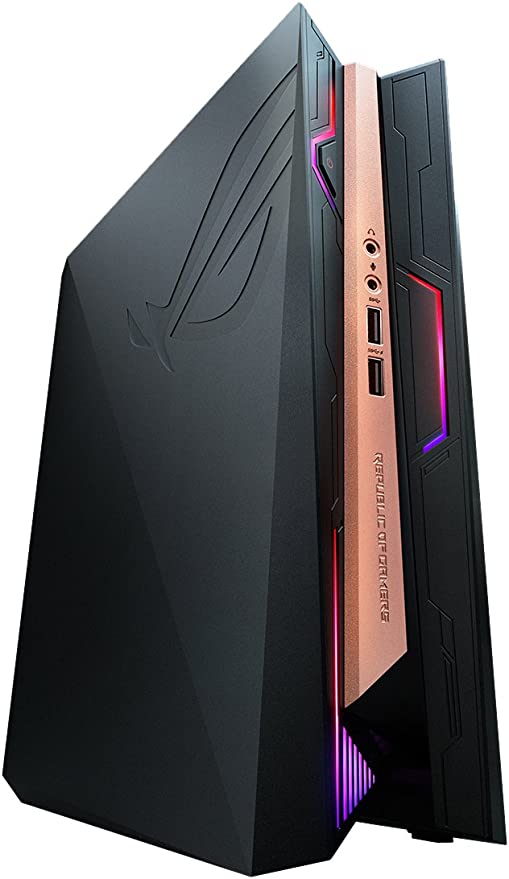
It’s a 2018 ASUS GR8 II-6GT024Z VR Ready Mini PC Gaming Desktop with Intel Core i7-7700 and GeForce GTX 1060 6G Video Card. All things considered it’s a powerhouse when it comes to what I need for retro gaming, even if it’s not available for purchase anymore and won’t be supported by Windows 11.

Here are the basic specs:
| Processor | 4.2 GHz core_i7 |
|---|---|
| RAM | 16 GB DDR4 |
| Hard Drive | 1 TB SSD |
| Graphics Coprocessor | NVIDIA GeForce GTX 1060 |
| Chipset Brand | NVIDIA |
| Card Description | Dedicated |
| Graphics Card Ram Size | 6 GB |
| Wireless Type | 802.11ab |
| Number of USB 3.0 Ports | 4 |
So, while I type this, I’m performing that fresh Windows 10 install to start from scratch and begin the documentation process. While we wait for that, let’s talk about the primary front end I’ll be using.
Don’t forget to pack your LaunchBox
I’ve tried a few front ends over the years, and most of the time they’re targeting specific emulating systems (MAME for example, has plenty of front ends, but that’s assuming you’re primarily dealing with MAME things). I really adored HyperSpin in the mid 2010s, but I haven’t checked it out lately. I think I’ll still use HyperSpin for a dedicated MAME cabinet (Project Pedestal), but I’m not considering it for this round.
I played around with LaunchBox quite a few years ago when it was in the early years, and I’ve been enjoying seeing the updates and enhancements (like BigBox) since then. With the inherent support for multiple platforms and the capability for me to examine the datafiles (they’re stored in XML files inside the LaunchBox directory) easily, I can use LaunchBox to store configurations for the various games and I can also export that data to my ‘Bucket List‘ database, and from there I can auto populate my Twitch stream with box art, game metadata, and my personal high scores and playtime.
I also wanted to be able to have some custom data points, which LaunchBox supports. For example:
- Series Index – I use a field I call Series Index to indicate what order I should play a game when it’s part of a series. Sometimes the titles aren’t an indicator (looking at you, GoldBox RPGs), and while I could use release date, I liked having a dedicated data-point.
- Port Indicator – I don’t do this for all the games, but for some where I want to try out different versions, like say ‘BurgerTime’ on Atari 2600, Intellivision, Commodore 64, etc. – I use this to link together individual game/platform combinations together.
LaunchBox also has created a database to pull a lot of metadata down for recognized games, along with EmuMovies integration for video and additional art. We can also pull down manuals, which is a big help so I don’t have to find the ASCII text files or open my game boxes up needlessly.
So, I head over to the LaunchBox site, purchased a lifetime license, and went to work on the install. You can of course install the free version, but I purchased it a looooong time ago, so I’m going to use my permanent license.
I’m leaving some hard drive space for the OS, but most of my stuff will be installed on a D: drive so I can keep some parts separated from the main OS. We’ll see how well that works – ideally nothing should FORCE me to stay on the C: drive but you never know. Personal preference, really – I could do all this on C: if I really wanted to.
After launching LaunchBox, I attached my GOG profile and my EmuMovies account subscription for future game and metadata downloads.
That’s it for this round. Next chapters will probably be platform specific as I set up emulators and related utilities.
