Last Updated on July 11, 2020.
If you’re running a dedicated Atlas server, you’ll notice that as of the time of this writing, you don’t see ‘claim bubbles’ on your in game map like you would on official servers. Here’s how to set it up so that you can see claim markers on your own map, as well as the browser map – including Company claim areas, beds, and ships.
Last updated: 2/3/2019 – General troubleshooting section updated
Please note: I Atlas no longer. This information is probably no longer relevant, but I’ll keep it around for the time being.
I’ve updated this guide to support the new Atlas Map Generator so it supports web browser claim bubbles, beds, and ships.
* Key things with my setup that may cause your mileage to vary: *
- I host my maps through the servers themselves, so my Map URL of my ServerGrid.json isn’t using an external host – it’s blank.
- I have my redis database server and the AtlasTerritoryMap process colocated – if you don’t, you’ll need to open the redis port so the generator can access redis remotely.
- I have full control over my host (i.e. not Nitrado)
- I’m not behind my home network router (potential NAT loopback issues)
Download The Generator
The claim territory generator tool, known as ‘AtlasTerritoryMap’ is downloaded from Grapeshot’s Github:
https://github.com/GrapeshotGames/AtlasTerritoryMap
You may see some references to GO dependencies. This is only if you’re recompiling. As of this time it supports Windows as an EXE – if you want a Linux version you’ll need to figure out how to compile that accordingly.
All you need to do is click ‘Download Zip’ for the executable and supporting files. You can IGNORE any of the ‘GO’ dependencies, GIT, and GO itself if you just want to use the territory map generator as is. Unpack that folder (preferably on your server) into a directory of your choice and edit the JSON file ‘config.json’.
Edit The Configuration
Key things you’ll need to change in this file:
"Host": "", //I recommend putting your PUBLIC facing IP here.
^^^ USE YOUR PUBLIC IP HERE – NOT LOCALHOST or 127.0.0.1 ^^^^
"GridSize": 1400000.0, //Should match your ServerGrid.json file
"ServersX": 15, //Size of grid layout aka 2x2, 4x4, or 15x15
"ServersY": 15, //Size of grid layout aka 2x2, 4x4, or 15x15
If you’re planning ahead of time to have a browser based map available as well, change this to true
"EnableTileGeneration": false,
You’ll also need to look at the Redis database sections and adjust ports and password accordingly. If you’re running this on the same server as your redis db you won’t need to open any Redis ports. You’ll want to look at the 6379 port and default password of ‘foobared‘ and change accordingly.
Open the Ports
You’ll notice in the JSON config you’ve most likely left the default 8881 port alone and added your IP to the ‘Host’ configuration variable. You’ll need to open your firewall for this port (I did both UDP/TCP for what it’s worth)
1. Test IN-GAME map generation
You should not need to restart your game servers or redis db at all, but you DO need redis running to make use of these programs.
It also really helps when you’re testing initially to run these programs from a command prompt window (not double-clicking) so you can see any errors before the process terminates. Also, if you find that you can’t execute the program at all, you should check your Windows properties on the file to see if it’s being blocked by policy settings.

After you’ve updated your config and opened your firewall ports, you can execute the AtlasTerritoryMap.exe and you’ll start seeing the following if all is well:
What this means is that it’s essentially working. You don’t actually utilize the URL generated by the tool yourself (going to http://myhost:8881 just displays a blank HTML page by default). This URL is inserted into Redis, and referenced by your game clients. (That’s why we needed to open up the firewall for port 8881).
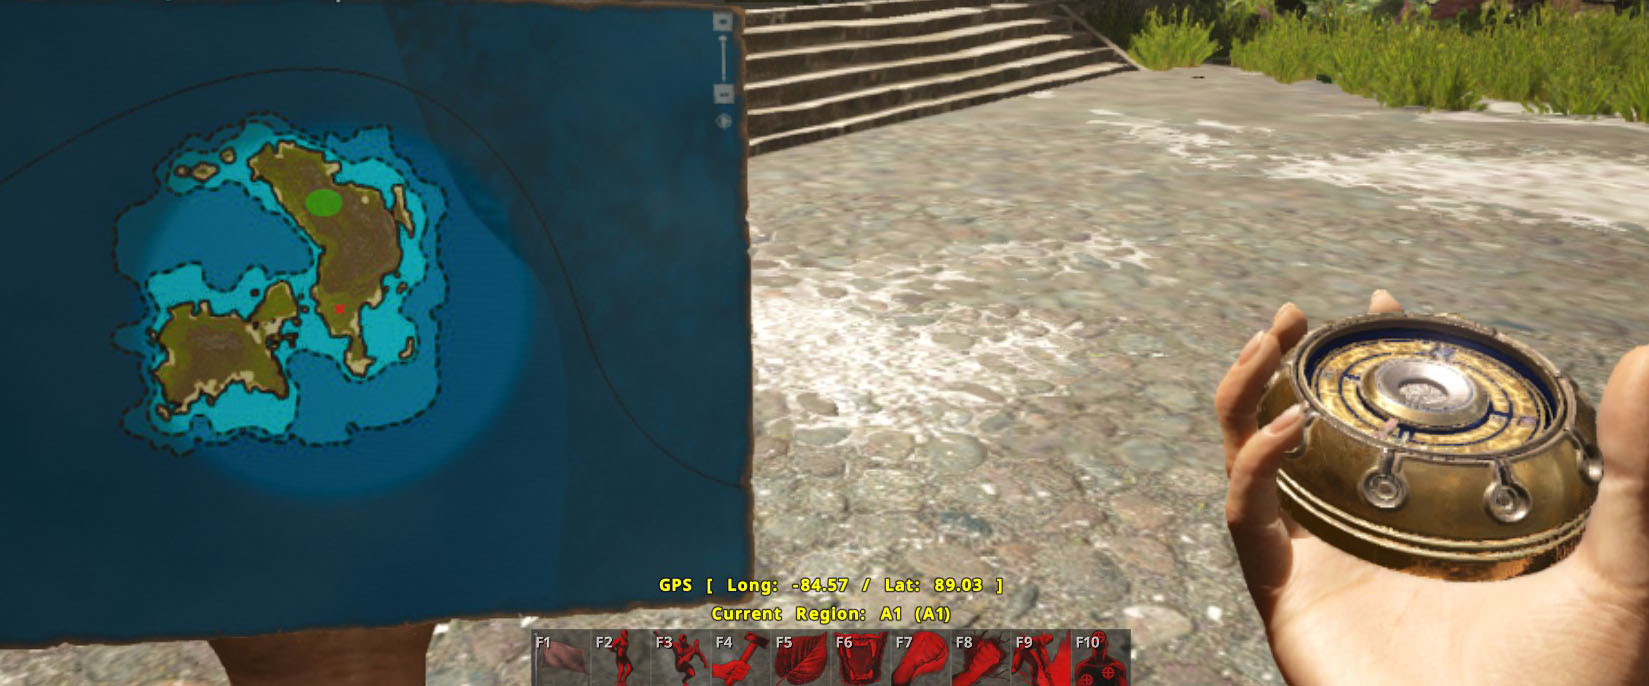
If you go into Atlas, you should see claim markers pop up:
2. BROWSER Based Map Setup:
Grapeshot has released another tool to assist in viewing not only claim bubbles, but ships and beds as well, including tribe info.
Download the zip of this program:
https://github.com/GrapeshotGames/AtlasMapViewer
I installed this in it’s own separate directory.
So now I have two folders:
- AtlasTerritoryMap-master – This generates the in-game claim bubbles, and is used by the web map to pull those as well – we set that up in the beginning of this guide.
- AtlasMapViewer-master – This is the web browser version that pulls tribe data, beds, and ships, and if you setup the AtlasTerritoryMap like we did above, claim bubbles as well.
Say the public IP of our AtlasTerritoryMap is http://1.2.3.4:8881. Assuming we’ll be putting the AtlasMapViewer on the same host, we’ll put that as http://1.2.3.4:8880
Edit your AtlasMapViewer-masterSrcconfig.json file:
 {
     "Host": "1.2.3.4",
     "Port": 8880,
     "TerritoryURL": "http://1.2.3.4:8881/territoryTiles/",
     "StaticDir": "./www",
     "FetchRateInSeconds": 30,
     "DisableCommands": true,
     "RedisAddress": "127.0.0.1:6379",
     "RedisPassword": "foobared",
     "RedisDB": 0
}
You must use the public IPs for host and territory URL. Localhost won’t cut it.
Also, change the redis IP, Port, and Password as needed. If your running this program on a different server than your redis server, you should open the redis firewall ports (which you probably did already for the in-game claim bubbles in part 1.)
Next, edit the AtlasMapViewer-master/Src/www/config.js file:
const config = {
      ServersX: 4,
      ServersY: 4,
      Suggestions: [
         "spawnshipfast name",
         "spawnbed name",
         "destroyall",
     ]
}
Change ServersX and ServersY accordingly. Even if your map is NOT square, make the numbers square. So if you run a 4×3, use 4 for both X and Y here. If you run a 3×5, use 5. This is because the generated tiles from your Server Map Editor still are made as squares at this time. (Hence the empty cyan tiles you’ll see if you’re not a square map)
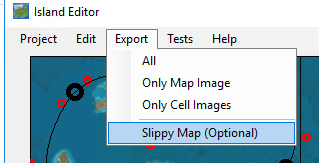
You should already be vary familiar with this tool. Export your map via the Slippy Option into the AtlasMapViewer-masterSrcwwwtiles directory. (You’ll notice that directory already has files in it – that’s the official map and you should delete those first)
To export the slippy map, use the export menu option in your map editor:

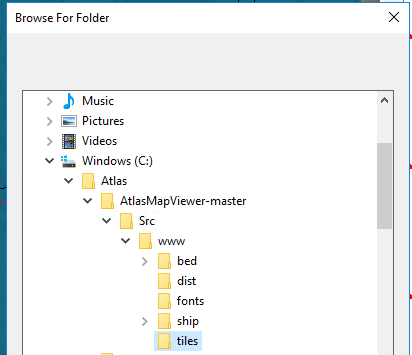

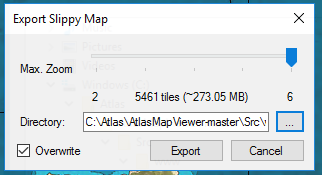

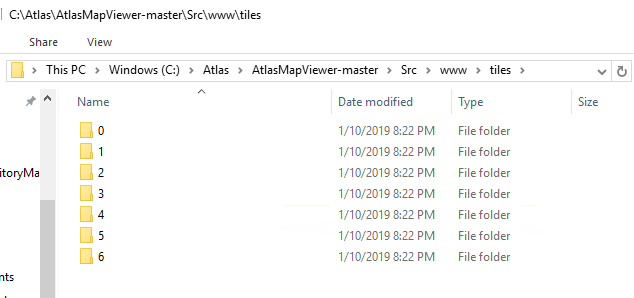
The generation can take a while, but afterwards your tiles directory should now be loaded, one directory per ‘zoom-level’:

Enable the 8880 port on the firewall
Just like we opened up 8881 for the territory process for in-game claims, we’ll need to open 8880 as well for our map process.
Launch and test
Now, we already have the AtlasTerritoryMap-master running from part 1. We now launch the AtlasMapViewer-masterSrcAtlasMapViewer.exe (So you’ll always have both processes running)
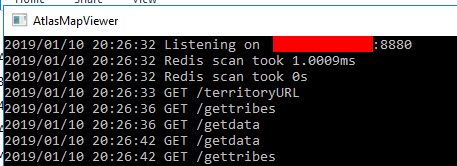

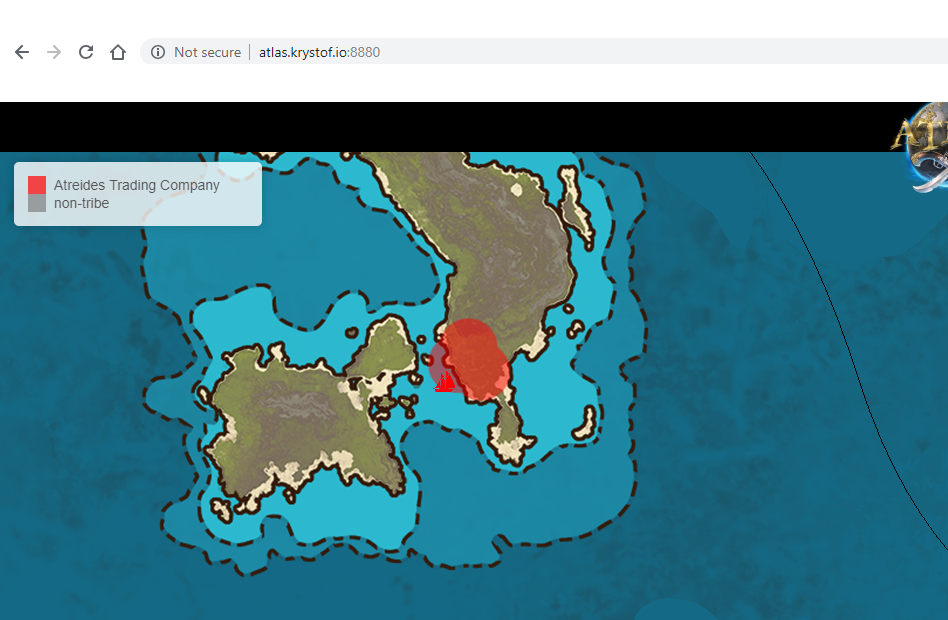
You should now be able to browse to your host on the 8880 port and see the following:
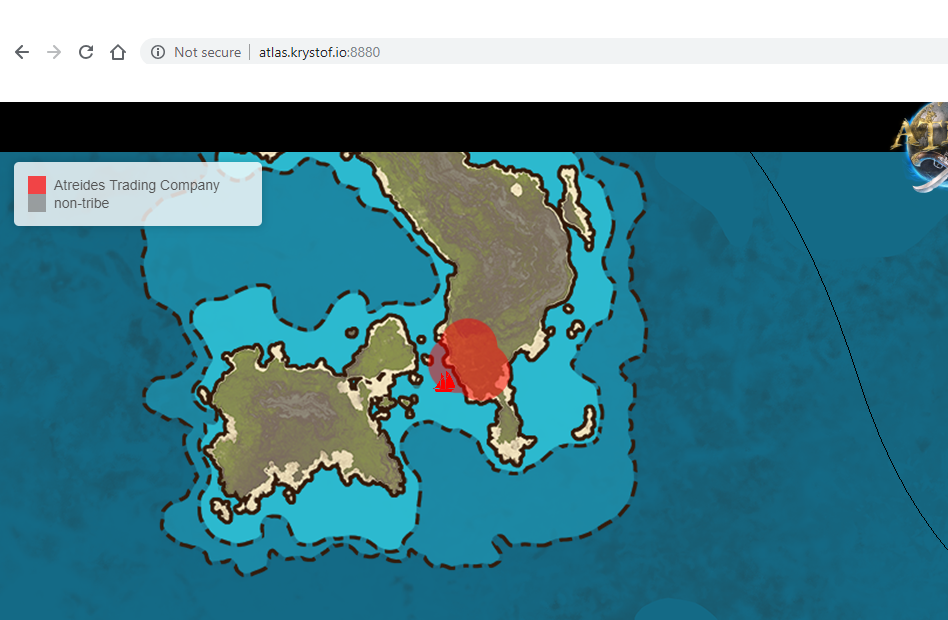

You can see the claim bubbles and an icon representing my ship on my small test map showing up. If you mouse over the filter button (the three dimensional squares) on the far right top of the map screen you can toggle ships or beds on and off!
Troubleshooting common issues
This happens for two reasons that I know of, one is an easy fix, the other I don’t have enough detail on yet.
1A) Use local copies of the react Javascript code.
You’ll see links in the index.html file that pull down two react Javascript files:
<script crossorigin src="https://unpkg.com/react@16/umd/react.development.js"></script>
<script crossorigin src="https://unpkg.com/react-dom@16/umd/react-dom.development.js"></script>
If you enter those URLs in your browser and save them locally, it might get rid of any cross site scripting warnings in your browser, I downloaded them and placed them in a js folder underneath where my index.html is:
<script  src="js/react.development.js"></script>
<script  src="js/react-dom.development.js"></script>
I did not have to do that for leaflet. Your mileage may vary.
1B) The other cause – too much data? Bad data?
I’ve seen some people reporting in their browser console an error like 'Cannot read property 'on' of null'.
It could be if you have a crap ton of tribes or markers, the map viewer executable is pulling too much back. It could also be a piece of data is bad – it’s hard to say whether the server is giving bad data or data the client Javascript code can’t handle (as I’m unable to reproduce this) This will most likely need a patch somewhere, and at this time I don’t have a dataset with this issue to test against, so feel free to describe the scenario to GrapeShot on their github and they might be able to assist. I am merely theorizing it’s too much data or a bad piece of data.
2. My browser map is fine but my in-game claim markers are misaligned!
Running the old version of the generator gave me some mismatched claim bubbles:


This has been addressed as of 1/10/2019 through the reporting of this issue:
https://github.com/GrapeshotGames/AtlasTerritoryMap/issues/2
That issue with non square grids has been resolved, testing with Grapeshot’s latest version means the patch I had up here is no longer necessary. If you’re still having an issue with this, you should update with the latest from their GitHub so you get properly aligned claim bubbles:
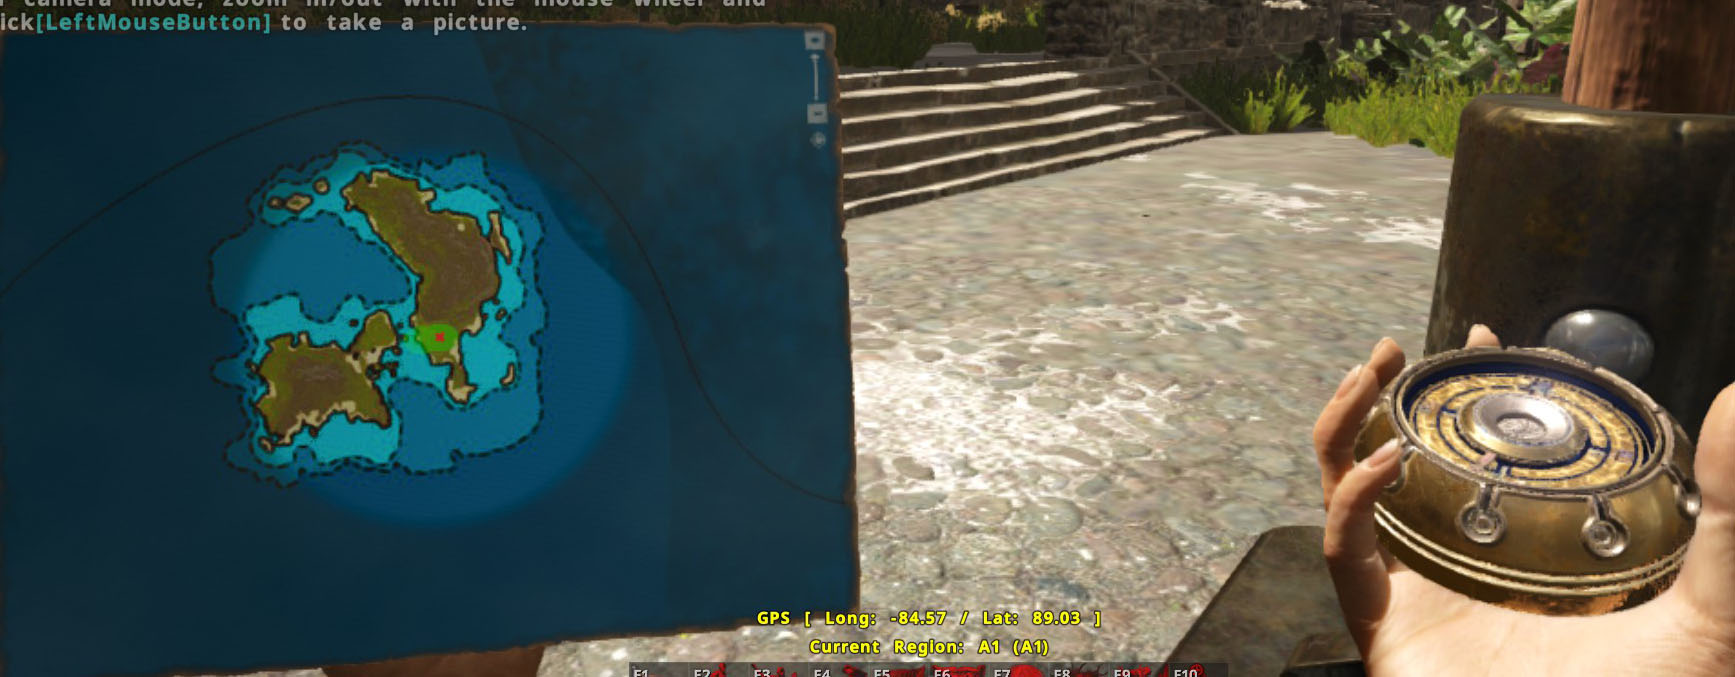

3. You get NOAUTH Authentication required when executing the territory generator or map viewer
Take a good long look at your redis-config in your AtlasTools directory (or your alternative redis-install if you’re using a different redis server than provided by Grapeshot Games). Is your password set? Typically we only need to change the port or password in that file if we deviated from the basic defaults from the Atlas install. If you’re using a different redis install, make sure any IP binding or security restrictions are set by comparing your config to the AtlasTool’s redis configuration, that might lead to some options to try.
